wall INSTALLATION

A WATERTIGHT wall INSTALLATION SOLUTION FOR DIYS & PROFESSIONAL RENOVATORS

Before Installation

You will need:

  • Enough Dekomuro wall panels to cover the desired area.
  • 1” wide IFDT (Industrial Foamed Double Tape)
  • The large “L” and small “V” shaped molding for each 90-degree corner.
  • “F” molding to finish off the edges.
  • Finish type cutting tools for the Dekomuro panels.
  • Tools for removing and replacing shower heads, knobs, bath faucets, etc.
  • Measuring tape.
  • Bathroom-grade silicone sealer.
  • Window cleaning spray with ammoniac.

1.

Clean walls and remove shower head, faucet, and handles. Remove all silicone around the bathtub. This system is the same for shower wall installations. The only difference is the wall sizes. The DEKOMURO wall system can be installed on existing walls or directly on the frame of the wall for new builds.

2.

Measure the back wall and find the center at the top and bottom of the wall. In most cases, perpendicular walls are not perfectly square. Finding the center line at the top and bottom will ensure that the two PVC panels installed later in the process will be of equal width.

3.

Align the top and bottom part of the tape with your center marks from Step 2 and Stick the 1” IFDT tape. The use of the “IFDT” is one of the “Innovations” for installing wall panels without the use of any adhesive. It accelerates the installation process and the 1/8” thick foam reduces the unevenness of the subsurface.

wall Installation

To cut the boards, you can score the top with a sharp blade and then snap them or use a laminate cutter. For more precise and complex cuts we recommend using a circular saw or jigsaw.

4.

Remove the 2 protective skins of the 1/4” IFDT on the back side of the corner molding (larger “L” piece), and adhere to both corners. Start from top to bottom. Repeat the same operation on the other corner. The molding provides a 90-degree angle and up to 3/4” tolerance for adjusting panel position.

5.

Install 6 more strips of the IFDT to the back and side walls for the center of each panel. For the 2 side walls, install one strip of the IFDT a 1/4” inside of the edge of the outside walls, then find the center line between the corner molding and the edge IFDT strip. Spacing between IFDT strips should not exceed 16”

6.

If necessary cut the panels to size. The standard panel size is 36.8” W x 102.1”L. Make sure that the tongue and groove profile is on the side where the panels meet. The tongue and groove profile is not necessary on the sides that meet the molding. It is important that the panel reach at least 50% of the IFTD in the molding but does not obstruct the middle insert of the corner molding.

7.

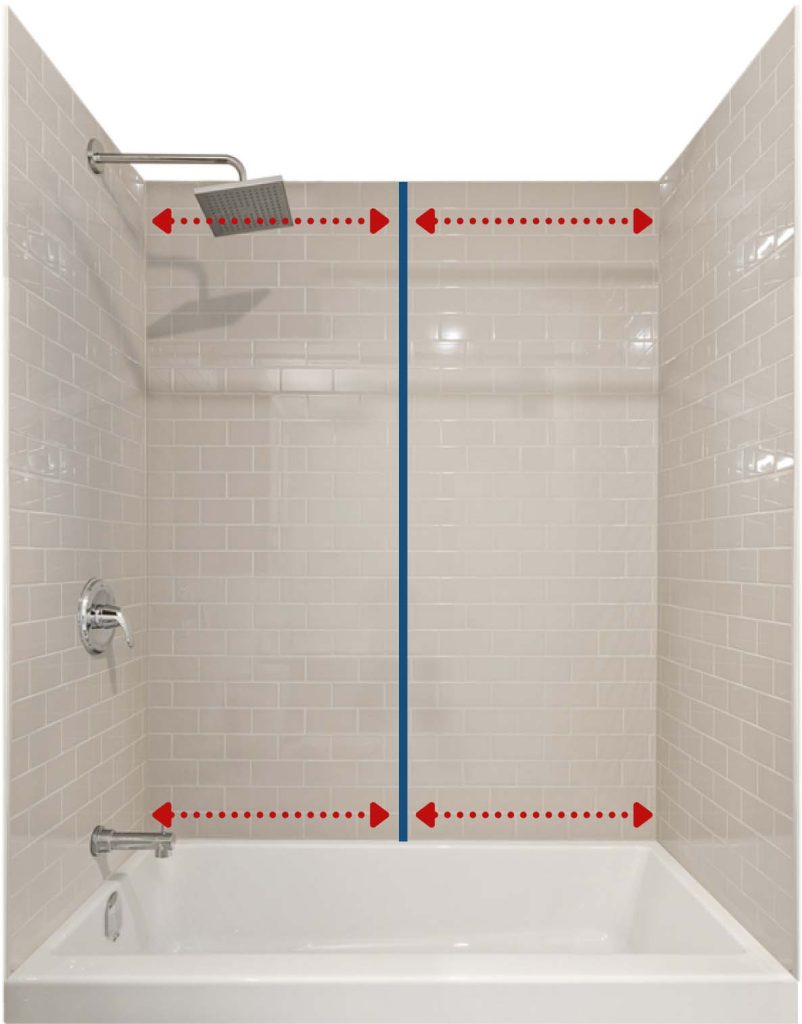
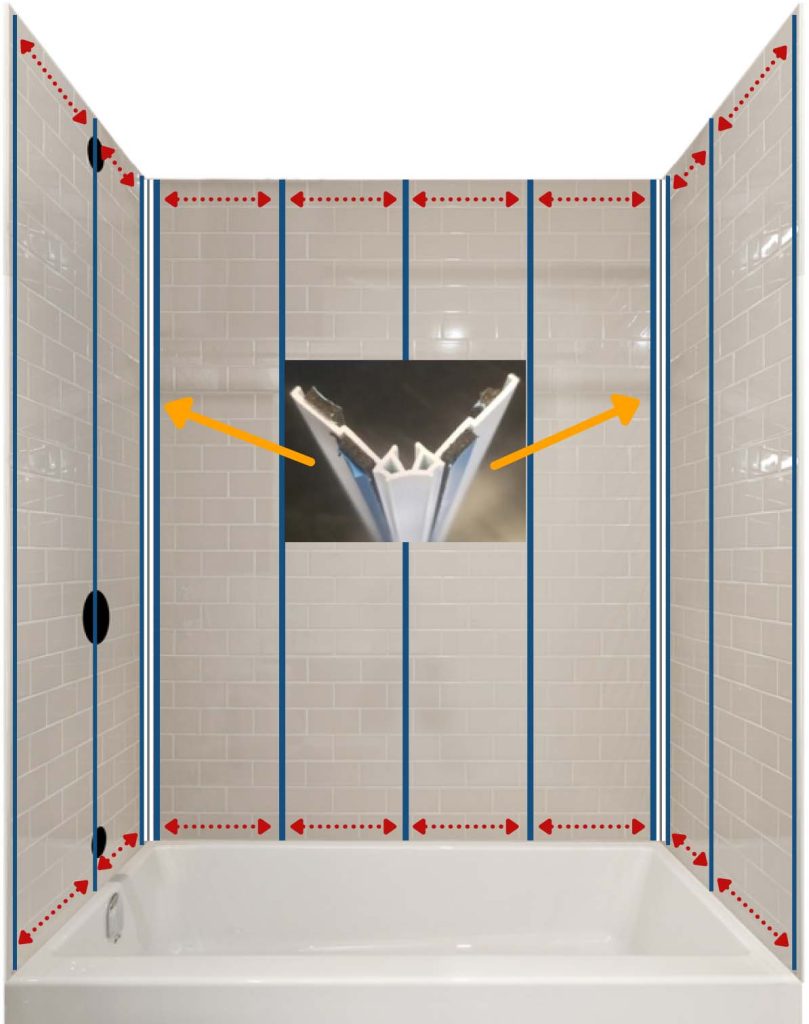
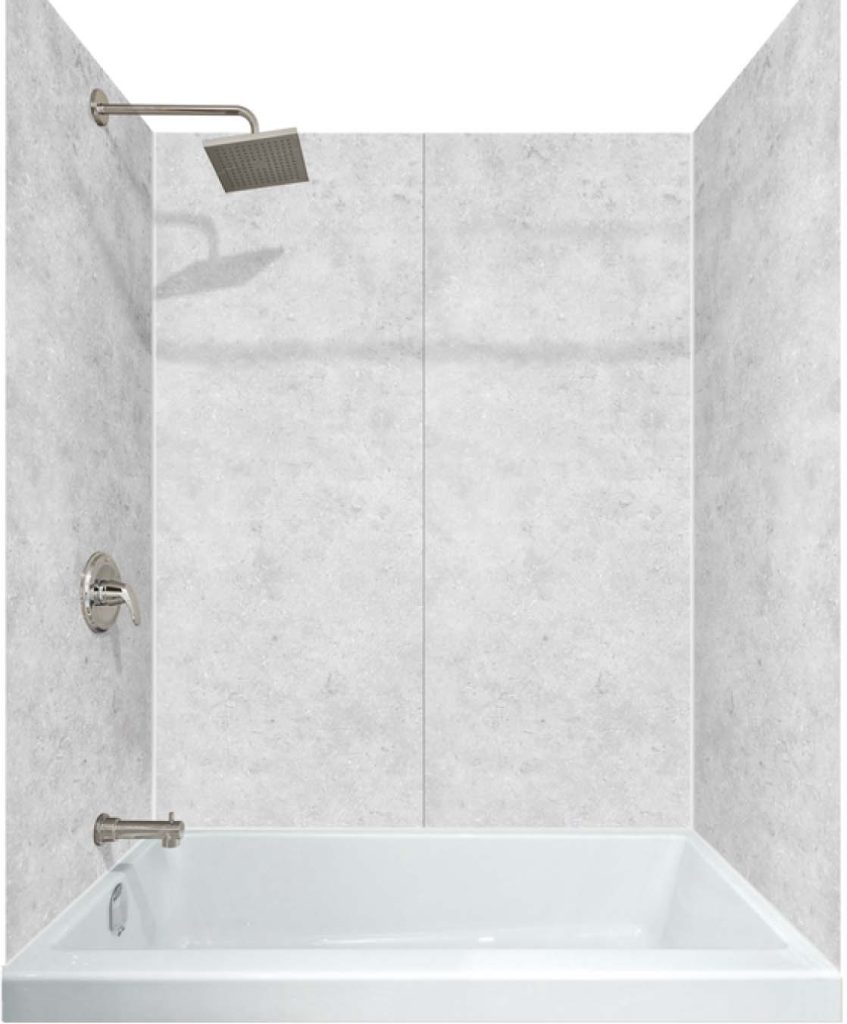
After PVC Panels are cut to size (if needed), install the first panel. Remove the protective skin of the IFDT strip in the center and the center-left. Remove the protective skin off of the corner molding on the right side. Align the right side of the panel with the middle of the center IFDT strip. Then push the panel back against the wall until it has adhered to all of the IFDT behind it.


DEKOMURO’s IFDT is extremely strong and quick bonding, once the panel has stuck to the tape it might be difficult to move or remove the panel for adjustment. An option to slow the bonding is the use of a window cleaning spray, making the surface of the tape temporarily less sticky. We do not recommend that this option be used on all IFDT strips because the panel will not hold on the wall correctly. Ideally, we suggest using this option only with the center strip, where two panels meet, allowing you to push the tongue and groove of the panels together before adhering the rest of the panel to the IFDT.

8.

Repeat the process for the rest of the panels. For any panels with fittings, cutting holes in the PVC Panel is easy, but the placement of the holes is important. Take all measurements for the openings from the outside edge of the panel, and from the top surface of the bath or floor. Position the measurements on the PVC panel from the side that is not connected to the corner molding and the bottom of the panel. You can use a hole saw (door or jig saw) to make the holes.

9.

When installing the smaller “V” molding the length of the molding may need to be adjusted to make sure it fits. Remove the 2 blue protective skins of the IFDT on the back of the molding. Start at the bottom of the wall, align the “V” molding with the corner, and clip it into the back corner molding by tapping gently with a rubber mallet. The top molding will be very tight against the PVC panels and the IFDT will complete the watertight seal.

10.

If needed the DEKOMURO edge trim can be used as a “U” molding, fitting tightly over the edge of the panel for a nice finish, or it can be used as an “F” molding when the edge of a panel ends at an adjacent wall. Simply cut the lip off of the “F” molding if you require the “U” shape molding. The trim can be glued with MAST Glue, ICA Group’s exclusive water and humidity-proof super-glue, or secured using silicone caulking.

11.

The last step is to reinstall the shower head, knobs, and bath faucet. Adding a silicone bead between the DEKOMURO Panels and the bath.

DEKOMURO offers a quick and economical solution thanks to its innovative wall installation system and 100% watertight corner molding. The DEKOMURO PVC panels resist mold and are easy to clean.

Get in touch